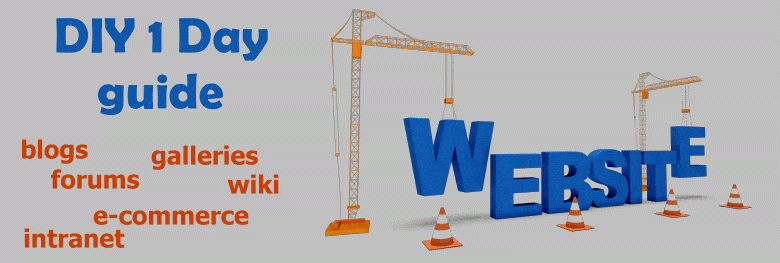
Creating Your Website
Creating a website may frighten many users, but with no reason. Technology has advanced so much that creating a website on your own, in less than a day, is now possible. And we are not referring here to a static one page website – you can get a professional looking and dynamic website like a blog, forum, interactive website or even e-Commerce that accepts online payments – all these with our easy Do It Yourself guide.
Getting started is easy: if you have reached this page, then you know how to use a computer and Internet, and these are all the skills you need to get your website up and running today. This guide will introduce you to the world of WordPress – a free platform that lets you build anything you want online, in a user-friendly manner, no technical knowledge required.
WordPress is a platform built and supported by a large community of users and developers from around the world, and you can use it to get any sort of website created too. To get an idea of how big WordPress is – 25% of the web is built today on WordPress. Do you like Affiliates.Wiki? Well this is built entirely on WordPress – it runs a standalone website (ex this page you are reading), it runs a forum with user registration and discussions, it offers a directory of resources, and we can do so many more things with it: e-shops, blogs, social networks, company intranet or wiki.
Hosting Your Website
 30 minutes
Installing Your Website
30 minutes
Customizing Website Features

2-4 hours
The timeframe for completing this step varies based on what functionalities you require on your website. While an experienced user can get this done in maybe 1 hour, we have set the time for you as a beginner to 2-4 hours.
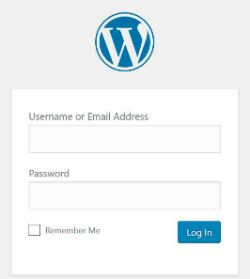 Main WordPress Settings: Once you have the WordPress platform installed on your domain – access its admin section and login with the details provided on setup. The login screen look like the image on the right.
After login, you will arrive in the WordPress admin panel. Here you will have to make a few small settings and clean-up to get started using the platform.
First go in the left sidebar menu and look for Plugins. Here you will have 2 plugins preinstalled by WordPress – “Hello Dolly” and “Aksimet:. You may go ahead and delete the “Hello Dolly” as this is a dummy plugin.
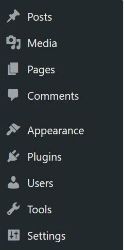 Then you can go in the same left sidebar and check the Settings section. In this Settings section you will find several sub-categories that we recommend going though each one of them.
- General Settings – this is where you set up the title of your website, the tagline, whether or not to allow user registrations, date format and website language.
- Writing – you may skip this at this stage
- Reading – you can skip this at this stage – return when you will be doing the design / content structure
- Discussions – this is where you can set the rules regarding comment posting on your articles
- Media – this sets the way images are organized on your website – we recommend un-checking the “Organize my uploads into month- and year-based folders”
- Permalinks – this sets the structure of the links on your website – we recommend setting this to “Post name”
Adding WordPress Features: At this step we will add the features we need to WordPress so that we can do whatever we want on the website. We will make use of plugins here to expand the functionality of WordPress. For this, we recommend first to familiarize with plugins before installing any of them, just to make sure you find the right one. Visit WordPress Plugins and make a search for what you need to add to your website: ex. ”forum”. You will get a list of results for plugins that can add forum functionality to your website. Recommendation: before choosing one, go through some of them and read what functionalities they offer to make sure it has everything you need (functionalities offered by different plugins differ); also, check mainly for plugins that have larger number of downloads as these are already tested by many other WordPress users, and may also have better support.
Once you found everything you need, you can start adding these to your website. Go back to the admin of your WordPress installation, on the left sidebar go to Plugins section and click on “Add New” button at the top. In the “Add Plugins” page you will be served with some featured plugins from WordPress – but given you already know what to install, just go to the top-right of the page at the “Search plugins…” field. Type in the name of the plugin you want installed – this will appear on the search results below. Once you found it, click on the “Install Now” button next to it and after installation click on “Activate“.
When the new plugin was installed, it will become available for settings in the left sidebar menu. From a plugin to another, it will either be available in the main sidebar, or as a sub-menu in Settings or Tools. Go through these plugin settings and make the changes you need. Everything will be straightforward – just some check boxes with explanations that will activate or de-active some features.
Bellow we have created a list of main plugins to get you quickly started with the functionalities you need:
- Forums: if you want to add a forum feature to your website, go to Plugins and search for “bbPress”. We also recommend getting a secondary plugin here called “bbp style pack” that will help you styling the bbPress forum. Make sure to go through the settings of each plugin once installed.
- eCommerce: if you want to create an e-shop on your website, go to Plugins and search for “WooCommerce”. This will add commerce functionalities like option to add products/services to your website, shopping cart and check-out/payments options. For payments you may be required to add other plugins – just search in Plugins for something like “WooCommerce PayPal” if you want to add PayPal for payment option, or any other payment processor. Make sure to go through the settings of each plugin once installed.
- Social Network: if you want to create a social network style website where users can register, add friends, create groups and discuss between them, go to Plugins and search for “BuddyPress”. BuddyPress can be further customized with some other plugins that can add more functionalities – just search for that in the Plugins section. Make sure to go through the settings of each plugin once installed.
Once you have added all functionalities you needed, we would also recommend adding a few extra plugins that can help you with SEO (search engine optimization) – so that your website gets indexed and shown in search results in Google, Bing or Yahoo: check for “All In One SEO Pack” plugin that helps customize titles and descriptions of your posts, and “Google XML Sitemaps” plugin that adds a sitemap to your website with list of all your pages for Google and Bing to download.
The WordPress repository offers an exhaustive list of free plugins to use, but in case you don’t find what you need here, there are some more professional plugins that you can check for your website, check these on CodeCanyon website.
Customizing Website Design
1 hour
Adding Content to Your Website
We are not adding a timeframe to this as it may be an ongoing task to add content, products or discussions on your website – so this is the part of running the website – the create you website process finished one step earlier.
- Visit the admin section of your WordPress website. In the left side menu, go to Posts section, where several sub-menus are available, like All Posts, Add New, Categories and Tags.
- In “All Posts” section you will find all posts that are published on your website. By default you will have dummy post that came with the WordPress installation. You can delete this one and create a new one by clicking on the “Add New” button at the top.
- In the post view, you have a title that needs to be set, and post content that you can customize with the default Edit bar (similar to Word documents – you can add headings, new paragraphs, make words bold, change the color or your content etc).
- After writing your post, you can go ahead and publish it on your website.
In the right side of the post content, you will have a few publishing settings: the “Publish” box comes with a “Publish immediately” or you can edit this to another date (for past date the post will become published, for future date the post will become available on the website on that particular day); hit “Publish” button to publish your content.
The second box in the right side of your content is for “Categories“. This is where you set the category of your post so that you can organize your content better. If the category is not created, you can do so by following the “+Add New Category” link there. Categories can be managed from the “Categories” sub-menu in the left sidebar of your admin panel, under “Posts”.
- Pages are parts of your website that should be set up as more static content. In the left sidebar menu, visit the “Pages” section. This is where you can edit and add new pages that you can use as home page of your website, contact page, or some other page sections that are required by the plugins you have installed like shopping cart or check-out for WooCommerce for example. Pages are managed similarly to the Posts section, only that these do not have categories.
Need Help
Do you need help setting up your website? We are here for you! Let us know what you need and we will install WordPress for your, all the main plugins and functionalities, and a theme of your choice for the price or $100.
Our service does not include posting content on your website, buying themes or plugins. If you require professional themes or plugins you must buy these separately and send them to us.
